DapperLogic keeps your B2B company locations in the right Markets catalog automatically,
driven by each customer’s tier tag. To connect, you create a private app in your Shopify
Dev Dashboard and hand us its credentials – then we do the rest. No coding, no app-store install.
Time ~10–15 minutesWho Shopify store ownerCost to install none
Why a private app? It connects to your store today without an app-store review, and
you keep full control – you can revoke our access from your Dev Dashboard at any time.
1
Open the Dev Dashboard & create an app
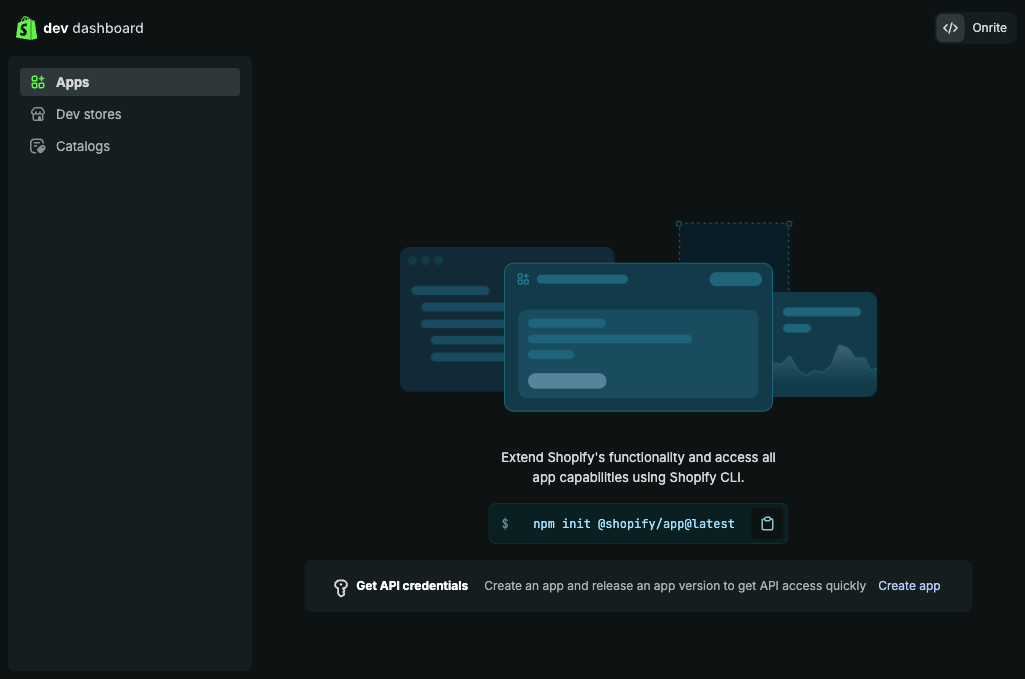
In your Shopify admin go to Settings → Apps and sales channels → Develop apps and click Build apps in Dev Dashboard (this opens dev.shopify.com). On the Apps screen, click Create app.
⚠ Create the app in the same Shopify organization that owns this store.
If you manage more than one organization (e.g. an agency or multiple brands), make sure the
Dev Dashboard is showing this store's organization – an app built in a different org
can't be installed here (Shopify returns an "organization mismatch" error).
The org name shows at the top-right of the Dev Dashboard.
dev.shopify.com › Apps
2
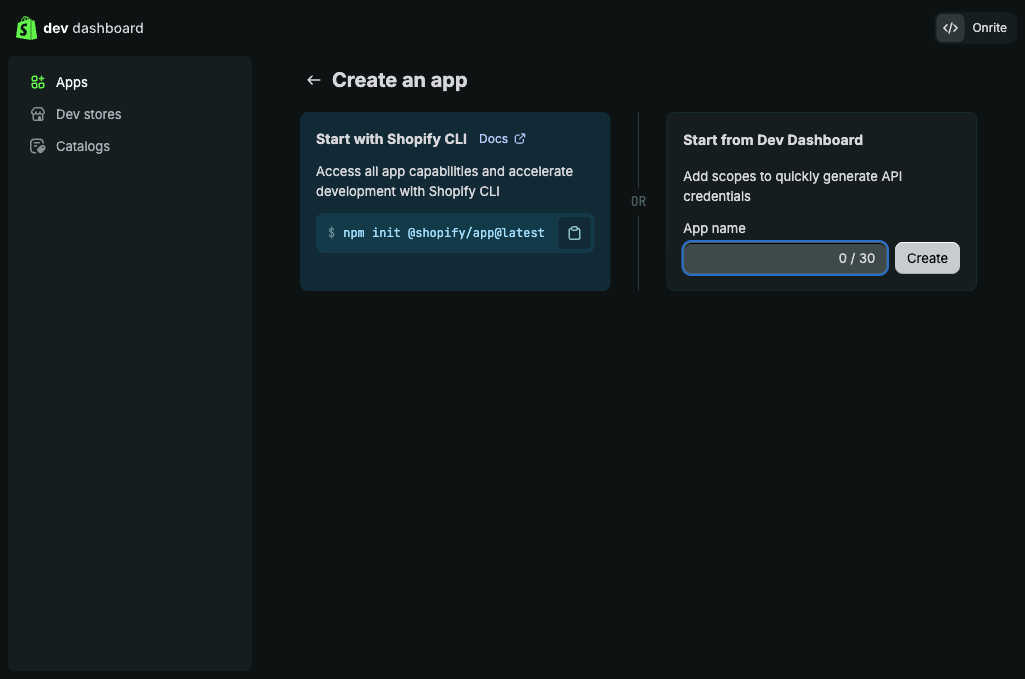
Name the app
Under Start from Dev Dashboard, name it DapperLogic B2B Sync and click Create.
dev.shopify.com › Apps › Create an app
3
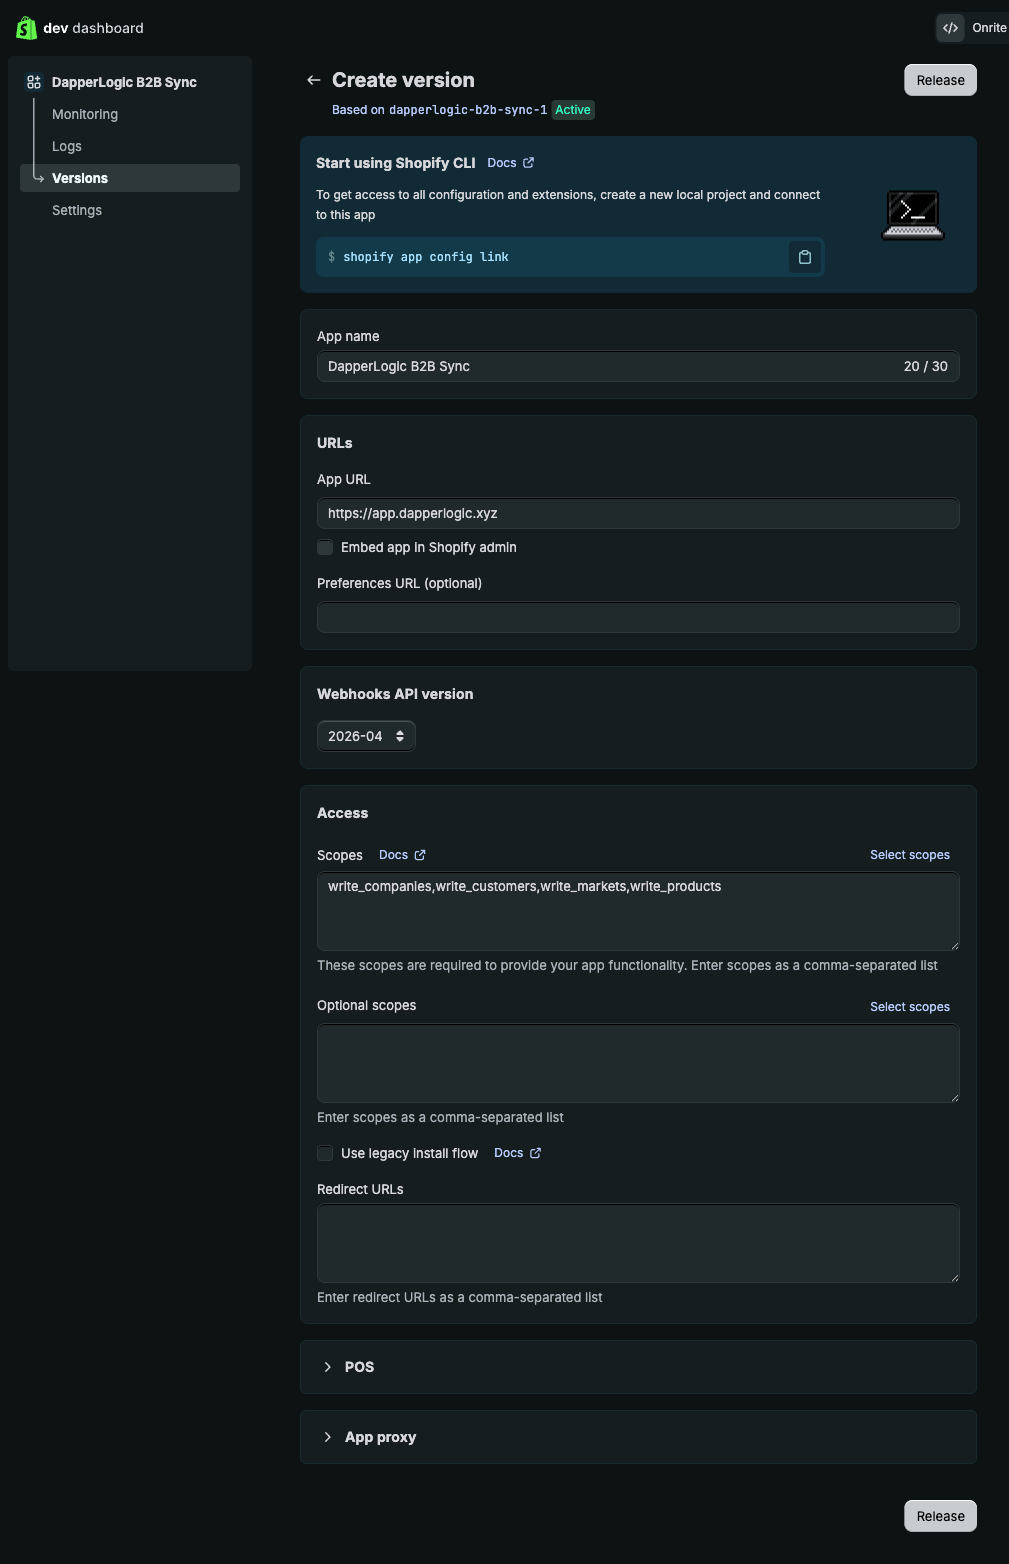
Set the scopes & app URL
Open Create version. Paste the four access scopes below, set the App URL, leave Embed app in Shopify admin unchecked, and keep the webhooks API version at 2026-04.
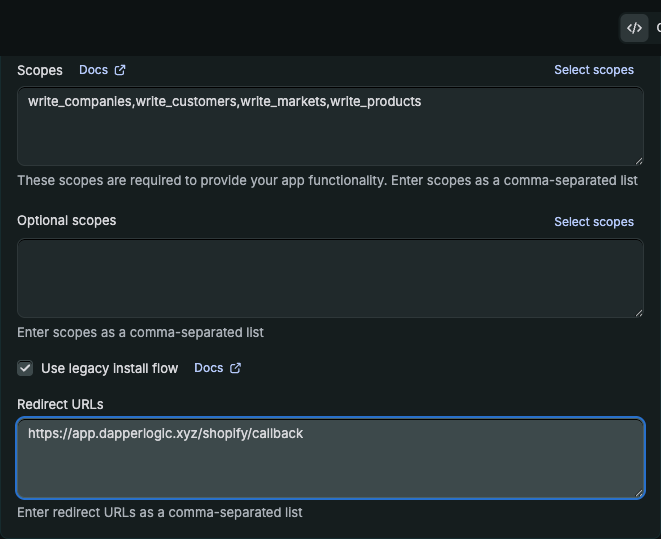
Enable legacy install flow + redirect URL, then Release
Still on the version form, tick Use legacy install flow and add the Redirect URL below. Click Release (twice – once on the form, once to confirm) to make the version active.
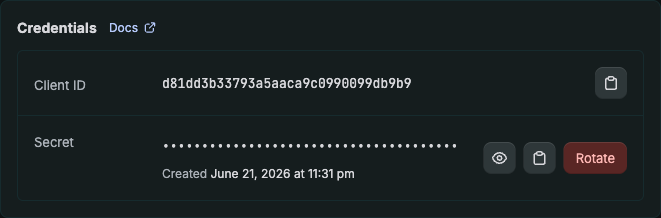
Open the Settings tab. Copy the Client ID, then click the eye to reveal and copy the Secret. Send both to DapperLogic over the secure link we provide – never plain email.
Treat the secret like a password. It grants access to your B2B catalog (never
to payment data). We store it encrypted at rest (AES-256-GCM) and transmit only over TLS.
Your app › Settings › Credentials
6
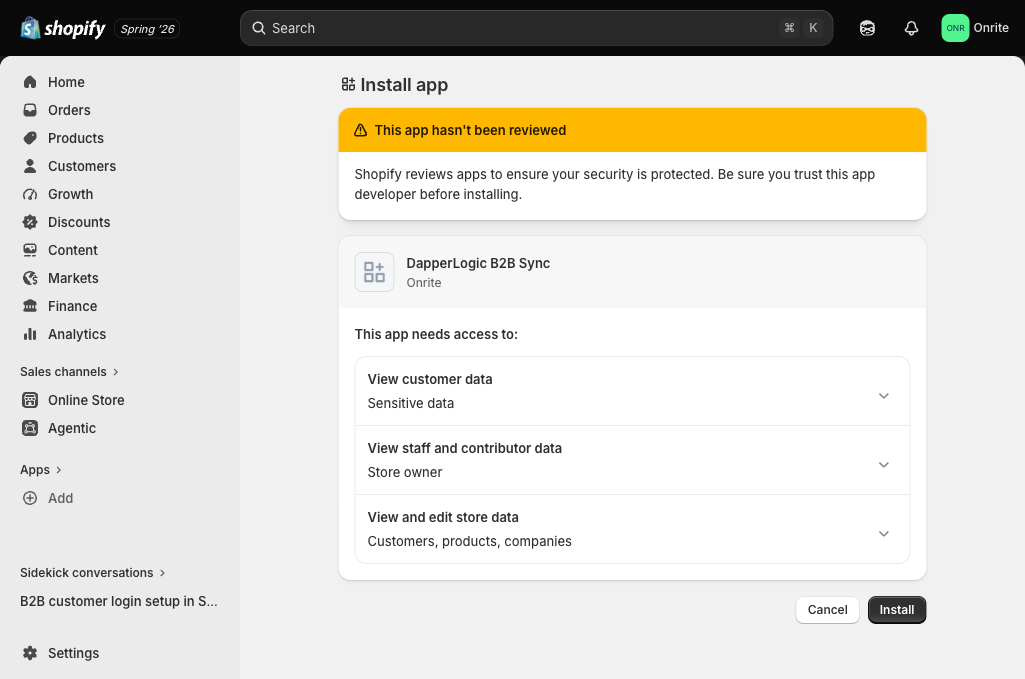
Click the install link & approve
We register your credentials and send you a one-click install link. Open it, review the access, and click Install. That’s it – your store is connected.
admin.shopify.com › Install app
What happens next
Once we have your Client ID and Secret, we:
Register your app and send you the one-click install link (step 6).
Map each tier tag to its B2B Market with you.
Run a dry-run reconcile so you see exactly what would change – zero writes until you approve.
Turn on the automatic sync. From then on it runs on a schedule and on customer changes.
You manage tier mappings, manual syncs, CSV imports, and the activity log from your dashboard at
app.dapperlogic.xyz.
Removing access
You can disconnect at any time from your Dev Dashboard, or by uninstalling
DapperLogic B2B Sync from your store’s Apps. That revokes the token and stops all
access to your store immediately.